 |
| The Easiest Email Harvester Tool |
_emails.txt And Scrapped Urls Will Be Saved In _scrappedUrls.txt. You Can Provide A Huge List Of Urls To Be Scanned
requirements
Python 3.9 (keep Scrawling To See the Installation Tutorial)
Windows/Linux/Mac
Pip3
Internet Connection (Obviously😜)
Installation
Clone The Repo From the Official Page Of OCEAN OF ANYTHING And Change the Directory To MailGrab
git clone https://github.com/oceanofanythingofficial/MailGrab

cd MailGrab
You Can Always Download A Zip File From Here And Use By Your Own
Windows
Just Run The install.bat File And Wait For The Installation To Complete.
install.bat
or
python -u install.py
Linux
It's Just Simple As That 😎. Just Run The Following Command And Wait For The Installation To Complete🙂.
sudo python -u install.py
ProTip! It's Necessary To Run Tis In Root Or Sudo
Mac
Install Python 3.9 (For Kids Who Dont Know How To Install Python 3.9)
Go And Visit The Official Page Of Python. Then Install Python On Your System. Make Sure To Install Python Version 3.9.0. To Prevent Any Mistake Please Use Link Bellow
You Can Also Install it From This Link
For Linux Or Ubuntu
Install Python 3.9 In Linux.
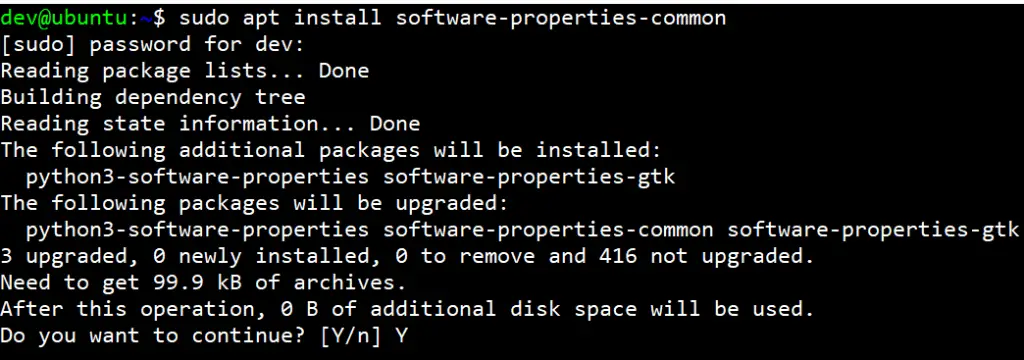
Step1- Install supporting additional packages
sudo apt install software-properties-common

Step2- Add Deadsnakes Ppa Repository To Install the Latest Python 3.9
Open Terminal And Enter The Following Command
sudo add-apt-repository ppa:deadsnakes/ppa

Step3- Update Ubuntu/Kali Repository
sudo apt update

Step4- Install the latest Python 3 (Version 3.9.0)
sudo apt install python3.9

Step5- Check the Python version
python --version
Installing Pip (Only For Linux Or Ubuntu)
By-default python3-pip is not installed in Ubuntu 20.04 and installing it from apt will install the old pip package. So let's see step by step installation of the latest python3-pip version (20.3.3). It will be a two-step process, first, we will install pip 20.0.2 using the apt repository. Then, download and install the latest pip package i.e. 20.3.3 version.
Step1- Install the python3-pip package using apt command
sudo apt install python3-pip

Step2- Check python3-pip version
Here pip version 20.0.2 got installed and we need to upgrade it to version 20.3.3. Installing package 3.8 from apt will help to meet all dependent packages and libraries which will be required for pip 20.3.3. If you will skip this step, you may get dependent modules error.

Step 3- Install the curl command first.
If curl is already installed on your system, you can skip this step. Most of the Ubuntu 20.04 don't have curl installed by default. So use the apt install command to install it. Curl is required to execute step 4.
sudo apt install curl

Step4- Download pip from bootstrap.pypa.io website
Now you need to download get-pip from the bootstrap.pypa.io website using the curl command as shown in the image.
curl https://bootstrap.pypa.io/get-pip.py -o get-pip.py

Step5- Upgrade python3-pip version to pip-20.3.3
Run the python3.9 command to execute the "get-pip.py" package file you downloaded. It will automatically download and install the latest pip in your Ubuntu/Kali Linux.
sudo python3.9 get-pip.py

Step 6 (optional)- Add pip3.9 directory to PATH.
This can be achieved by editing /etc/environment files using your favorite editor. Otherwise, exporting and appending the "PATH" variable for the local user profile will also do the trick. Make sure you add ~/.local/bin/ in the PATH variable.
export PATH=~/.local/bin/:$PATH

Step7- Check the pip version
pip3.9 --version

Congrats!! till this point, you have installed the latest Python 3.9.0 and pip 20.3.3 successfully.
Install Required Modules
pip install -r requirements.txt
For Windows
If You Are On Windows Machine, You Can Just Run windows.bat FileTo Start The Program Directly.
You Can Also Do It Manually-
Just Open Powershell Or Command Prompt And Then Type the Following Command
python -m MailGrab.py
For Linux
For Linux Users, You Just Have To Type The Same Thing Into the Terminal.
Just Open the Terminal And Type The Following Command
python -m MailGrab.py
Usage
MailGrab Is An Easy To Use, User-Friendly, Cross Platform And Reliable Tool
After Launching MailGrab Just Input Url And It Will Automatically Do It's
Work.
It Will List All Emails And SubUrls In the Terminal. It Will Save Them Also In A Text File For Future
!ProTip You Can Provide A Huge List Of Urls In A File Named
_inputUrls.txt
. It Will Automatically Detect The File In the Current Directory And Will Harvest From The Emails One By One!
This Is A secret Please Dont Tell To Anyone!


1 Comments
I Officially Own The Right To Post The Contents Of OCEAN OF ANYTHING OFFICIAL
ReplyDelete